Navy Aircraft - Blue/Grey Primary
Created by: Monkphin
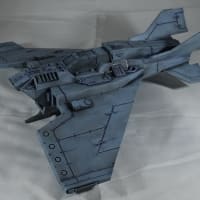
This is a recipe that shows how to paint the blue-grey colour that I use for my 40K Imperial Navy fliers, be it bombers, fighters, transports etc. It uses the following paints: Black Primer (AK Interactive) Mechanicus Standard Grey (Citadel) Dawnstone (Citadel) Fenrisian Grey (Citadel) Drucchi Violet (Citadel)
No paints listed for this stage. No paints listed for this stage. No paints listed for this stage. No paints listed for this stage. No paints listed for this stage. No paints listed for this stage.-
Stage: 1 None
-
Stage: 2 NoneNo paints listed for this stage.
Depending on the paint used and its application, you may need to go over the undercoat again to solidify the black. This step isn't essential, but I find having a stable and solid black layer to start with helps keep the colours consistent.
-
Stage: 3 NoneNo paints listed for this stage.
First base coat - this is a heavy drybrush of Mechanicus Standard Grey, if you dont get 100% coverage of the mini, don't worry too much it'll help with shadows if you miss the odd recessed part, it also helps give the paint a more worn look. We want an all over brush of the paint for where you want the colour to be applied. Ideally while we want to remove some paint from the drybrush here, we still want it reasonably wet, so a quick scrub over some card should be enough to get the excess paint off here.
-
Stage: 4 NoneNo paints listed for this stage.
Assuming you're happy with the coverage of the next stage once its dried we can move on to the next layer. This time it's a drybrush of Dawnstone. Again don't worry too much if you miss the odd recessed part, since it helps with shading. Similarly the flatter piece can get away with being patchy thanks to their being another layer of paint to go. It will also help to sell some wear and tear on the paintwork, since it can give a less than perfect uneven look like can sometimes be seen in the real world. Much like the last stage, this will be an all-over brush for wherever you want this colour to be used.
-
Stage: 5 NoneNo paints listed for this stage.
Next up is the final stage with standard paints, before we move onto washes. Time to break out the Fenrisian Grey. Much like the Dawnstone layer we want to dry brush this. Since we're looking at a lighter dry brush, we want to remove much more paint than before, to the point of the brush seeming empty - don't worry too much Fenrisian Grey is quite a fluid paint, so can give great coverage off a seemingly emptied dry brush.
-
Stage: 6 NoneNo paints listed for this stage.
Finally, once the last stage has dried we want to pin wash with the Drucchi Violet, this is just to give some shade and depth to recesses, or around rivets or other raised details that need a bit of shadow. It can also be used in a streaking motion on flatter surfaces to show some wear over the paintwork, or other effects.


